Wednesday, September 14, 2011

Topology: Quarters, Dimes, Index Card, Scissors and You


Starting Small: A Quarter Through a Dime-Sized Hole
  1. Fold an index card in half, widthwise.
  2. Unfold the card and trace a dime so that it is centered on the card. Use the crease as a guideline.
  3. Refold the card and cut out the shape of the traced dime.
  4. Now that you have a dime-sized hole, try to fit a quarter through it. It's just not possible, right?
  5. Here's the trick . . . .  With the card folded along the crease, place the quarter inside of the folded card. Make sure that the quarter is centered on the dime-sized hole you already cut.
  6. Grip each of the corners on the folded end of the card with your thumb and index finger. Pull the corners up and watch as the quarter slides out the dime-sized hole.
Going Big: Fitting Through an Index Card
  1. Fold an index card in half, lengthwise this time.
  2. Unfold the card and cut an incision along the crease that you've created. Don't cut all the way to the either end of the card. Leave 1/8" to 1/4" on each end.
  3. Fold the card in half again along the same crease as before.
  4. Carefully make a cut at the point your first incision stopped at a 90ยบ angle down towards the open or unfolded side of the card. Again, remember to leave a 1/8" to 1/4" gap.
  5. Repeat the previous step, this time starting from the open side of the card, leaving a gap before you get to the other incision.
  6. Continue making alternating cuts along the length of the card until you reach the other side.
  7. Gently pull the card open by pulling on the two ends of your original crease. The resulting, zig-zagging loop will be big enough to fit over your entire body!

How does it work?

Both of these Index Card Tricks are based on topology. Topology is concerned with continuous deformation of objects and how the way a surface or object is analyzed and manipulated determines how we understand it. Sounds complicated, right? The science of topology shows how you can alter the shape of an object without altering its size.
In the Quarter Through a Dime-Sized Hole experiment, you are able to change the perceived size of the hole without actually altering it. The squeezing and bunching of different areas of the card allow the hole to gain size along the width of the quarter.

In the Fitting Through an Index Card experiment, when you cut the card as the instructions direct you to, you do not remove any part of the card. You simply change the perceived layout in the zig-zagging loop that allows you to fit through it. In both experiments, topology allows you to change the shape or layout, but not the actual size.

SOURCE: Steve Spangler Science

Saturday, September 3, 2011

Chlorophyll, Chromatography, Colors

Of all the natural processes around us, the annual changing of leaves from green to different shades of yellow, orange, and red is perhaps the most beautiful. But behind this show of color, there are important scientific processes at work.

Want a peek into the science behind a tree's changing leaves? With this hands-on activity, you'll see how those colors stay hidden in the leaf all year long!

What You Need:

  • Leaves
  • small jar (a baby food or small salsa jars work well)
  • cover for jars or aluminum foil or plastic wrap
  • rubbing alcohol
  • paper coffee filter
  • shallow pan
  • hot tap water
  • plastic knife or spoon
What You Do:
 
1) Have your child collect 2-3 large leaves from the same tree type. You and your child should tear or chop the leaves into very small pieces and put them into small jars.  
2) Add enough rubbing alcohol to the jar to cover the leaves. Using a plastic knife or spoon, carefully chop and grind the leaves in the alcohol. 
SAFETY NOTE: rubbing alcohol can be harmful if mishandled or misused. Use in a well-ventilated area, and avoid contact with skin.
 
3) Have your child cover the jar very loosely with a lid, plastic wrap or aluminum foil. Place the jar carefully into a shallow tray containing 1 inch of hot tap water.
 
4) Keep the jar in the water for at least a half-hour, longer if needed, until the alcohol has become colored (the darker the better). 
Twirl the jar gently about every five minutes. Replace the hot water if it cools off.

5) Have your child cut a long thin strip of coffee filter paper. 
Remove the jar from the water and uncover it. Place a strip of filter paper into the jar so that one end is in the alcohol. Bend the other end over the top of the jar and secure it with tape.
The alcohol will travel up the paper, bringing the colors with it. 
 
6) After 30-90 minutes the colors will travel different distances up the paper as the alcohol evaporates. You should be able to see different shades of green, and possibly some yellow, orange or red, depending on the type of leaf.

What happened?
Chlorophyll is a green compound that hides the other colored pigments present in leaves. In the autumn chlorophyll breaks down, allowing the other pigments to be seen. The mix of pigments in a leaf may be separated into bands of color by the technique of paper chromatography.

Chromatography involves the separation of mixtures into individual components, which you just did using alcohol and energy (heat). Then, by "absorption" and "capillarity," separation can take place!
The paper holds the substances using absorption, while capillarity pulls the substances up the paper at different rates. Pigments are separated on the paper and show up as colored streaks or bands.
Pretty cool, huh?

As possible extension activities compare different types of leaves and/or experiment with other types of paper.


Mike is a 20-year veteran science teacher, and runs an online business (www.scienceinabag.com). Over the years Mike has studied trends in science, education, and finance, conducting research, developing programs, and writing articles on these topics.

SOURCE: Education.com

LAGNIAPPE:  Chlorophyll in Olive Oil

Thursday, September 1, 2011

Mysterious Appearing Colors (Benham's Disk)

Video followed by explanation. Source link.


We know that red and blue make purple, blue and yellow make green, and that yellow and red make orange. Most of all, we know that when you mix black and white you get…um…a rainbow.

You can use black and white to make actual colors. See just how the spinning illusion can trick your eyes.

Materials

Mysterious Appearing Colors
  1. Click on the downloadable template and print it out on craft paper or card stock.
  2. Cut out one of the four circular designs.
  3. Break a toothpick in half and stick one of the halves through the design you cut out. Make sure the pointed end of your toothpick is on the blank side of the disk.
  4. You've made a top. Give the top a spin and watch the design on the top. What do you see?
  5. Repeat steps 2-4 with the other three circular designs. What do you notice about these designs as they spin?

Observations

Once you've got the disk spinning, take a look at the circular design on it. What's going on over there? Where did all of those colors come from?
*Note* Some of the disks only produce colors at certain speeds, some faster or slower than others.

How does it work?

Hmmm… how does it work? That's a really good question. We honestly don't know for sure. No one does. But we've got some pretty good guesses.
The black and white circular design that you printed out and pasted to your cardboard is called Benham's Disk. 
Benham's Disk originated over 100 years ago and, when spun at the right speed, creates a changing pattern of light that is noticeable by your retina. 
Many scientists think that the visible pattern of light created by the disk resembles a "code" similar to what the brain receives when the eyes see color. The rapidly spinning black and white disk tricks the brain into seeing the colors. Crazy!


Wednesday, August 31, 2011

Engineering Ground Zero (NOVA)

Building Green
The new season of NOVA kicks off with Engineering Ground Zero. This month, SPARK explores green energy as it relates to sustainable building. From defining alternative energy to understanding the influence of Mother Nature in building construction, these resources shed light on the direction and future of building innovation.
Join us on Facebook and Twitter, or visit the NOVA Teachers and Teachers' Domain websites to tap a wealth of great STEM-related video clips, animations, interactives, and activities.


Keep investigating!
Rachel Connolly, Director of Education, NOVA
future_cities
Designing Future Cities: Alternative Energy
Can you design the green city of the future? 
Take on the role of city planner and work out design solutions that incorporate innovative energy alternatives.
Video (2m 11s), Grades 3-8
stone_arches
Physics of Stone Arches  
How do arches stay standing? 
Try your hand at constructing a cathedral arch and learn more about the physics behind the arch.
Interactive, Grades 7-12
green_technology
Green Technology: Sustaining the Earth
How can technology move us toward a greener future?
Explore areas of research and innovation in green technology: renewable energy and conservation; green building; transportation; manufacturing; and pollution and waste management. 
Interactive, Grades 6-12
structureofmetal.jpg
The Structure of MetalWhat makes metal special?
Explore metal at the atomic level and find out what makes it such a versatile material.
Interactive, Grades 6-12
super_materials
Nature's Super Materials
How is Mother Nature inspiring the next generation of strong materials?
See some of the amazing structures and properties that animals and plants have evolved, and learn about new human-made super-materials they are giving rise to.
Interactive, Grades 6-12

It's Elemental (with example worksheet)

Whether they are created by nature or in the lab, chemical substances are all made of some combination of just 118 pure elements.

These elements come together to produce an amazing diversity of materials. In this interactive, discover which elements are most abundant in the universe, the sun, and the Earth as well as in the human body and in that flashiest of human creations—fireworks.

Also, learn which elements have the most extreme properties on the periodic table.
 
 
  In this interactive periodic table, explore the elements and their properties and abundances.

A previous version of this feature originally appeared on the site for the NOVA program Kaboom!.


EXAMPLE WORKSHEET (with answers)

Elements of the SUN

 Pablo Cortez  IHM

8-31-11 Wednesday

1st most abundant element of the SUN: Hydrogen
Symbol: H
Family: Alkali metals

2nd most abundant element of the SUN: Helium
Symbol: He
Family: Noble gasses

3rd most abundant element of the SUN: Oxygen
Symbol: O
Family: Nonmetals

4th most abundant element of the SUN: Carbon
Symbol: C
Family: Nonmetals

5th most abundant element of the SUN:  Nitrogen
Symbol: N
Family: Nonmetals

6th most abundant element of the SUN: Neon
Symbol: Ne
Family: Noble gasses

7th most abundant element of the SUN: Iron
Symbol: Fe
Family: Transition metals

8th most abundant element of the SUN: Silicon
Symbol: Si
Family: Nonmetals

9th most abundant element of the SUN: Magnesium
Symbol:  Mg
Family: Alkaline earth metals

10th most abundant element of the SUN: Sulfer
Symbol: S
Family: Nonmetals


Sources:

NOVA:  http://www.pbs.org/wgbh/nova/physics/periodic-table.html 

Data provided by PeriodicTable.com. Melting point, boiling point, and density data apply to elements at standard atmospheric pressure. 


Magic Rollback Can - Transfer of Energy

Potential and kinetic energy at work in this magical demonstration! Video first followed by a description. Source Link


Magic Rollback Can - Sick Science!
In our long line of "magical" science, we introduce the Magic Rollback Can. The Magic Rollback Can appears to be a normal can of coffee or oats, but after you roll it along the ground a little ways and watch it come back, you'll be wondering just how it works.

Materials

  • Coffee or oats can
  • Nail or other hard pointed object
  • 9-volt battery or object with similar weight
  • Rubber band 
  • 2 paperclips
  • Tape
Magic Rollback Can
Magic Rollback Can
Magic Rollback Can
Magic Rollback Can
Magic Rollback Can
Magic Rollback Can
Magic Rollback Can
Magic Rollback Can
Magic Rollback Can
Magic Rollback Can
  1. Using the nail, make a hole in the middle of the bottom of your coffee or oats can. Be extra careful when using sharp objects. Also, if you are using a coffee can, be careful around the sharp metal edges that you may create when making the hole.
  2. Poke the same kind of hole in the lid of the can.
  3. Tape the 9-volt battery to the middle of the rubber band. Make sure both sides of the rubber band are taped to the bottom of the battery.
  4. Push one end of your rubber band loop through the hole in the bottom of the can and secure it there by attaching one of the paperclips. Once you have it secured, tape the paperclip down.
  5. Stretch the rubber band across the length of the can and push the other end of the rubber band loop through the hole in the lid.
  6. Secure the rubber band with a paperclip and tape it down.
  7. Put the lid on the can. Does the battery rub against the side of the can? If not, you're good to go. If it does, try a shorter rubber band.
  8. Getting the set-up just right may take a bit of experimentation, but you'll get it!
  9. Set the can on its side on a hard surface or short carpet floor and give it a roll. Once the can comes to a stop, try to contain your excitement as it begins to roll back to you!

How does it work?

The Magic Rollback Can is a great example of transfer of energy. When you roll the can, it has kinetic energy. As it slows down, the energy is transferred into potential energy within the twisted rubber band inside the can. The twisted rubber band's potential energy is then transferred back to the can in kinetic energy as it untwists.
The secret to all this energy transfer comes from the weight that you've taped to the rubber band inside the can. While the weight is being pulled down by gravity, it is also being subjected to a twisting force from the rubber band. So long as the force being exerted by gravity on the weight is greater than the twisting rubber band's force on the weight (meaning the weight never goes over the rubber band), the rubber band will continue to twist.
Once all of the kinetic energy from the rolling can has been exhausted by converting to heat (friction) or potential energy (twisted rubber band), the can stops rolling and the weighted rubber band is able to unwind. Because of the weight in the middle of the rubber band, only the ends of the loop are able to unwind and, therefore, the can begins to roll backwards.

Additional Info

If you are looking to take the Magic Rollback Can to the next level, try painting it a solid color. If you do this, observers won't be able to see the apparatus on the ends of the can. This makes the Magic Rollback Can a perfect "Black Box" tool for teachers. Show your students what the Magic Rollback Can does, and have them observe and hypothesize how the can might work.

Physics of the Stone Arches (NOVA interactive)


Arches

Medieval architects were masters at building with stone. But as cathedral design evolved, some medieval architects began to push beyond the boundaries of known structural design and into unknown territory.

With the pursuit of taller and taller cathedrals, any errors could lead to catastrophic collapses. In this interactive, try your hand (safely) at constructing a cathedral arch and learn more about the physics behind the arch.

  See if you can build a cathedral arch without it collapsing, and learn more about the forces at work.

Editor's Note: The arch diagrams and thrust lines are simplified for illustrative purposes. Our interactive arch exists in a virtual world that does not completely reflect real-world physics.

Wednesday, August 10, 2011

Berry pH Paper

A homemade litmus test to detect acids and bases

Berry pH Paper - Sick Science!
No longer must you search for specialty litmus paper. Here is  a formula that will allow you to create your own acid and base detecting litmus paper using little more than a bit of fruit.

Materials

  • 1/2 cup of blackberries
  • 1/4 cup of water
  • 2 tablespoons of dish soap
  • 1/4 cup of vinegar
  • Bowls or other containers
  • Water
  • Scissors
  • White construction paper
  • Paper towels
  • Zipper lock bag
Berry pH Paper
Berry pH Paper
Berry pH Paper
Berry pH Paper
Berry pH Paper
Berry pH Paper
Berry pH Paper
Berry pH Paper
Berry pH Paper
Berry pH Paper
Berry pH Paper
Berry pH Paper
Berry pH Paper
Berry pH Paper
Making the Paper
  1. Remove any stems or leaves from your berries and place the berries in a zipper lock bag.
  2. Zip up the bag and mash and mush your berries until they look like jam.
  3. Add a small amount of water to thin the juice a bit.
  4. Mix it all up and pour your berry liquid into a bowl.
  5. Cut some thin strips of the white construction paper and dip them into your mashed berries. Push the strips all the way into the berry mush to make sure they are good and coated with the juice.
  6. After taking your "berry" well-soaked paper out of the juice, pull the strips between your thumb and index finger to remove any excess juice and pulp.
  7. Lay the strips onto paper towels and allow them to dry.
  8. Once your paper strips have dried, carefully pick off any large pieces of pulp or berry skins. You're ready to use your Berry pH Paper.
Putting Your "Berry" Own pH Paper to the Test
  1. Pour 1/4 cup of water into a bowl and mix in two tablespoons of dish soap.
  2. In a separate bowl, pour 1/4 cup of vinegar.
  3. Dip half of one strip of your Berry pH Paper into the bowl containing dish soap and water. Do the same thing with another strip of Berry pH Paper, but this time dip it into the vinegar.
  4. Set the Berry pH Paper strips onto a piece of paper towel to dry. This should only take about five minutes. Make sure you label the pH strips to remember which strip was dipped in which liquid.
  5. What color changes did you notice? Which liquid was an acid? Which liquid was a base?
Cool... but how do I use it?
Blackberry pH Paper turns pinkish red in acids and turns deep purple in bases.

How does it work?

Blackberries, blueberries, strawberries, and a bunch of other flowers, leaves, and stems are naturally occurring pH indicators. This is true because they contain chemicals from the anthocyanin family of compounds. Anthocyanin compounds turn red in acids and blue in bases when they are in their pure form. In this case, we have the anthocyanin compounds within the juice of the berries. This results in a less distinct, but still distinguishable, color change.

Additional Info

Try testing out other liquids like milk, soda, or fruit drinks to find out which ones are acidic and which ones are basic. 

Wednesday, June 15, 2011

Inflate a Balloon in a Bottle

How hard would it be to inflate a balloon in a plastic soda bottle?

Balloon in a BottleSome things look so easy until you try them. Case in point, how hard would it be to inflate a balloon in a plastic soda bottle? Hey, no big deal. Just put the balloon down inside the bottle and puff away. 
 
That's until you realize something about the properties of air. Don't worry, Steve Spangler will show you how to be amazing.

Materials

  • 1-liter bottle
  • Latex balloons
  • Rubber stopper or cork
  • Water
  • Nail
  • Hammer
Balloon in a Bottle
  1. Slip the balloon inside the neck of the bottle and stretch the mouth of the balloon over the bottle top.
  2. Take a deep breath and try to blow up the balloon inside the bottle. Good luck!
  3. Remove the balloon, fill the soda bottle to the brim with water, then seal it with a cap.
  4. Ask an adult to punch a small hole with a nail and hammer in the side of the bottle, close to the base.
  5. Remove the nail, uncap the bottle, and empty the water out the top.
  6. Place the balloon in the bottle again (Step 1) and try to blow up the balloon. Quite a difference! Blow hard until the balloon fills most of the bottle (a little water left in the bottle helps). Place a finger (or thumb) over the nail hole when you stop blowing. You are too cool! Now, move your finger.

How does it work?

Balloon in a Bottle
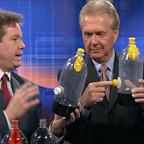
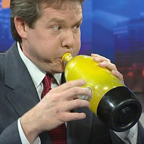
The balloon won't inflate much the first time because the bottle is already filled with air. There's no room for the balloon to expand inside the bottle. However, when you punch a hole in the bottle, the air molecules in the bottle have an exit. They're pushed out as the balloon fills the space inside. As long as you plug the hole, the balloon stays inflated.
When you take your thumb off the hole, outside air flows back into the bottle as the balloon collapses.
Because of the elasticity of the rubber or latex, the balloon shrinks to its original size as the air rushes out the top of the bottle.

By the way, when you filled the bottle with water, you made its walls more rigid and it was easier to push the nail through the flexible plastic. Who'd ever think that flowing, soft water could give that much support?

Balloon in a Bottle
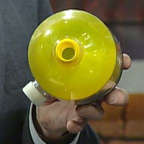
Try this! Inflate the balloon in the bottle again and cover the nail hole with your thumb. Pour water into the balloon while keeping your thumb over the hole. Go outside or hold the bottle over a sink before you remove your thumb. Watch out for that stream of water gushing out of the bottle top! You might decide to hand a full water-balloon-bottle to a friend and just "forget" to tell them about the hole.

Suppose your thumb gets tired while the balloon is inflated. Put a cap tightly on the bottle and remove your thumb. For the air to flow, both holes have to be open. How would more holes or even one large hole change the speed of inflating and deflating the balloon? What would more or bigger holes do to the stream flowing from the water-balloon-bottle? Try it out! Balloons and bottles make a great science combo!

Source: http://www.stevespanglerscience.com/experiment/00000166

Wednesday, June 1, 2011

NOVA Spave Videos


spacesuits
Next-Generation Space Suits
How have giraffes inspired revolutionary changes in space suit design?
Today's suits are notoriously bulky. MIT's Dava Newman is out to change that with a radical, and sleek, new design.

Video (10m 45s), Grades 6-12
spacefood
Space Food  
How do you keep food fresh on a three-year round-trip to Mars? 
NASA scientist-chefs are devising new ways to keep space food tasting fresh and healthy.
Video (6m 51s), Grades 6-12
plasmarocket
Plasma Rockets
Why does it take so long to get to Mars and how can we speed up the trip?
With a "small sun” for an engine, a new rocket might be able to zip us to Mars and back in under three months.
Video (6m 38s), Grades 6-12
spacetools
How Would You Turn a Bolt in Space?How does gravity help a person on Earth who is using a power drill?
Watch and astronaut explain the challenges of using of tools in space.
Video (0m 47s), Grades 3-8
zoomweightlessness
What is "Weightlessness?"
How can you experience "weightlessness" on Earth?
See how dropping a cup of water can create a condition of "weightlessness."

Video (1m 17s), Grades K-8