Showing posts with label Experiment. Show all posts

Saturday, September 3, 2011

Chlorophyll, Chromatography, Colors

Of all the natural processes around us, the annual changing of leaves from green to different shades of yellow, orange, and red is perhaps the most beautiful. But behind this show of color, there are important scientific processes at work.

Want a peek into the science behind a tree's changing leaves? With this hands-on activity, you'll see how those colors stay hidden in the leaf all year long!

What You Need:

  • Leaves
  • small jar (a baby food or small salsa jars work well)
  • cover for jars or aluminum foil or plastic wrap
  • rubbing alcohol
  • paper coffee filter
  • shallow pan
  • hot tap water
  • plastic knife or spoon
What You Do:
 
1) Have your child collect 2-3 large leaves from the same tree type. You and your child should tear or chop the leaves into very small pieces and put them into small jars.  
2) Add enough rubbing alcohol to the jar to cover the leaves. Using a plastic knife or spoon, carefully chop and grind the leaves in the alcohol. 
SAFETY NOTE: rubbing alcohol can be harmful if mishandled or misused. Use in a well-ventilated area, and avoid contact with skin.
 
3) Have your child cover the jar very loosely with a lid, plastic wrap or aluminum foil. Place the jar carefully into a shallow tray containing 1 inch of hot tap water.
 
4) Keep the jar in the water for at least a half-hour, longer if needed, until the alcohol has become colored (the darker the better). 
Twirl the jar gently about every five minutes. Replace the hot water if it cools off.

5) Have your child cut a long thin strip of coffee filter paper. 
Remove the jar from the water and uncover it. Place a strip of filter paper into the jar so that one end is in the alcohol. Bend the other end over the top of the jar and secure it with tape.
The alcohol will travel up the paper, bringing the colors with it. 
 
6) After 30-90 minutes the colors will travel different distances up the paper as the alcohol evaporates. You should be able to see different shades of green, and possibly some yellow, orange or red, depending on the type of leaf.

What happened?
Chlorophyll is a green compound that hides the other colored pigments present in leaves. In the autumn chlorophyll breaks down, allowing the other pigments to be seen. The mix of pigments in a leaf may be separated into bands of color by the technique of paper chromatography.

Chromatography involves the separation of mixtures into individual components, which you just did using alcohol and energy (heat). Then, by "absorption" and "capillarity," separation can take place!
The paper holds the substances using absorption, while capillarity pulls the substances up the paper at different rates. Pigments are separated on the paper and show up as colored streaks or bands.
Pretty cool, huh?

As possible extension activities compare different types of leaves and/or experiment with other types of paper.


Mike is a 20-year veteran science teacher, and runs an online business (www.scienceinabag.com). Over the years Mike has studied trends in science, education, and finance, conducting research, developing programs, and writing articles on these topics.

SOURCE: Education.com

LAGNIAPPE:  Chlorophyll in Olive Oil

Wednesday, August 31, 2011

Magic Rollback Can - Transfer of Energy

Potential and kinetic energy at work in this magical demonstration! Video first followed by a description. Source Link


Magic Rollback Can - Sick Science!
In our long line of "magical" science, we introduce the Magic Rollback Can. The Magic Rollback Can appears to be a normal can of coffee or oats, but after you roll it along the ground a little ways and watch it come back, you'll be wondering just how it works.

Materials

  • Coffee or oats can
  • Nail or other hard pointed object
  • 9-volt battery or object with similar weight
  • Rubber band 
  • 2 paperclips
  • Tape
Magic Rollback Can
Magic Rollback Can
Magic Rollback Can
Magic Rollback Can
Magic Rollback Can
Magic Rollback Can
Magic Rollback Can
Magic Rollback Can
Magic Rollback Can
Magic Rollback Can
  1. Using the nail, make a hole in the middle of the bottom of your coffee or oats can. Be extra careful when using sharp objects. Also, if you are using a coffee can, be careful around the sharp metal edges that you may create when making the hole.
  2. Poke the same kind of hole in the lid of the can.
  3. Tape the 9-volt battery to the middle of the rubber band. Make sure both sides of the rubber band are taped to the bottom of the battery.
  4. Push one end of your rubber band loop through the hole in the bottom of the can and secure it there by attaching one of the paperclips. Once you have it secured, tape the paperclip down.
  5. Stretch the rubber band across the length of the can and push the other end of the rubber band loop through the hole in the lid.
  6. Secure the rubber band with a paperclip and tape it down.
  7. Put the lid on the can. Does the battery rub against the side of the can? If not, you're good to go. If it does, try a shorter rubber band.
  8. Getting the set-up just right may take a bit of experimentation, but you'll get it!
  9. Set the can on its side on a hard surface or short carpet floor and give it a roll. Once the can comes to a stop, try to contain your excitement as it begins to roll back to you!

How does it work?

The Magic Rollback Can is a great example of transfer of energy. When you roll the can, it has kinetic energy. As it slows down, the energy is transferred into potential energy within the twisted rubber band inside the can. The twisted rubber band's potential energy is then transferred back to the can in kinetic energy as it untwists.
The secret to all this energy transfer comes from the weight that you've taped to the rubber band inside the can. While the weight is being pulled down by gravity, it is also being subjected to a twisting force from the rubber band. So long as the force being exerted by gravity on the weight is greater than the twisting rubber band's force on the weight (meaning the weight never goes over the rubber band), the rubber band will continue to twist.
Once all of the kinetic energy from the rolling can has been exhausted by converting to heat (friction) or potential energy (twisted rubber band), the can stops rolling and the weighted rubber band is able to unwind. Because of the weight in the middle of the rubber band, only the ends of the loop are able to unwind and, therefore, the can begins to roll backwards.

Additional Info

If you are looking to take the Magic Rollback Can to the next level, try painting it a solid color. If you do this, observers won't be able to see the apparatus on the ends of the can. This makes the Magic Rollback Can a perfect "Black Box" tool for teachers. Show your students what the Magic Rollback Can does, and have them observe and hypothesize how the can might work.

Wednesday, August 10, 2011

Berry pH Paper

A homemade litmus test to detect acids and bases

Berry pH Paper - Sick Science!
No longer must you search for specialty litmus paper. Here is  a formula that will allow you to create your own acid and base detecting litmus paper using little more than a bit of fruit.

Materials

  • 1/2 cup of blackberries
  • 1/4 cup of water
  • 2 tablespoons of dish soap
  • 1/4 cup of vinegar
  • Bowls or other containers
  • Water
  • Scissors
  • White construction paper
  • Paper towels
  • Zipper lock bag
Berry pH Paper
Berry pH Paper
Berry pH Paper
Berry pH Paper
Berry pH Paper
Berry pH Paper
Berry pH Paper
Berry pH Paper
Berry pH Paper
Berry pH Paper
Berry pH Paper
Berry pH Paper
Berry pH Paper
Berry pH Paper
Making the Paper
  1. Remove any stems or leaves from your berries and place the berries in a zipper lock bag.
  2. Zip up the bag and mash and mush your berries until they look like jam.
  3. Add a small amount of water to thin the juice a bit.
  4. Mix it all up and pour your berry liquid into a bowl.
  5. Cut some thin strips of the white construction paper and dip them into your mashed berries. Push the strips all the way into the berry mush to make sure they are good and coated with the juice.
  6. After taking your "berry" well-soaked paper out of the juice, pull the strips between your thumb and index finger to remove any excess juice and pulp.
  7. Lay the strips onto paper towels and allow them to dry.
  8. Once your paper strips have dried, carefully pick off any large pieces of pulp or berry skins. You're ready to use your Berry pH Paper.
Putting Your "Berry" Own pH Paper to the Test
  1. Pour 1/4 cup of water into a bowl and mix in two tablespoons of dish soap.
  2. In a separate bowl, pour 1/4 cup of vinegar.
  3. Dip half of one strip of your Berry pH Paper into the bowl containing dish soap and water. Do the same thing with another strip of Berry pH Paper, but this time dip it into the vinegar.
  4. Set the Berry pH Paper strips onto a piece of paper towel to dry. This should only take about five minutes. Make sure you label the pH strips to remember which strip was dipped in which liquid.
  5. What color changes did you notice? Which liquid was an acid? Which liquid was a base?
Cool... but how do I use it?
Blackberry pH Paper turns pinkish red in acids and turns deep purple in bases.

How does it work?

Blackberries, blueberries, strawberries, and a bunch of other flowers, leaves, and stems are naturally occurring pH indicators. This is true because they contain chemicals from the anthocyanin family of compounds. Anthocyanin compounds turn red in acids and blue in bases when they are in their pure form. In this case, we have the anthocyanin compounds within the juice of the berries. This results in a less distinct, but still distinguishable, color change.

Additional Info

Try testing out other liquids like milk, soda, or fruit drinks to find out which ones are acidic and which ones are basic. 

Wednesday, June 15, 2011

Inflate a Balloon in a Bottle

How hard would it be to inflate a balloon in a plastic soda bottle?

Balloon in a BottleSome things look so easy until you try them. Case in point, how hard would it be to inflate a balloon in a plastic soda bottle? Hey, no big deal. Just put the balloon down inside the bottle and puff away. 
 
That's until you realize something about the properties of air. Don't worry, Steve Spangler will show you how to be amazing.

Materials

  • 1-liter bottle
  • Latex balloons
  • Rubber stopper or cork
  • Water
  • Nail
  • Hammer
Balloon in a Bottle
  1. Slip the balloon inside the neck of the bottle and stretch the mouth of the balloon over the bottle top.
  2. Take a deep breath and try to blow up the balloon inside the bottle. Good luck!
  3. Remove the balloon, fill the soda bottle to the brim with water, then seal it with a cap.
  4. Ask an adult to punch a small hole with a nail and hammer in the side of the bottle, close to the base.
  5. Remove the nail, uncap the bottle, and empty the water out the top.
  6. Place the balloon in the bottle again (Step 1) and try to blow up the balloon. Quite a difference! Blow hard until the balloon fills most of the bottle (a little water left in the bottle helps). Place a finger (or thumb) over the nail hole when you stop blowing. You are too cool! Now, move your finger.

How does it work?

Balloon in a BottleThe balloon won't inflate much the first time because the bottle is already filled with air. There's no room for the balloon to expand inside the bottle. However, when you punch a hole in the bottle, the air molecules in the bottle have an exit. They're pushed out as the balloon fills the space inside. As long as you plug the hole, the balloon stays inflated.
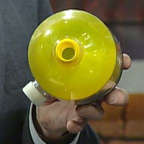
When you take your thumb off the hole, outside air flows back into the bottle as the balloon collapses.
Because of the elasticity of the rubber or latex, the balloon shrinks to its original size as the air rushes out the top of the bottle.

By the way, when you filled the bottle with water, you made its walls more rigid and it was easier to push the nail through the flexible plastic. Who'd ever think that flowing, soft water could give that much support?

Balloon in a BottleTry this! Inflate the balloon in the bottle again and cover the nail hole with your thumb. Pour water into the balloon while keeping your thumb over the hole. Go outside or hold the bottle over a sink before you remove your thumb. Watch out for that stream of water gushing out of the bottle top! You might decide to hand a full water-balloon-bottle to a friend and just "forget" to tell them about the hole.

Suppose your thumb gets tired while the balloon is inflated. Put a cap tightly on the bottle and remove your thumb. For the air to flow, both holes have to be open. How would more holes or even one large hole change the speed of inflating and deflating the balloon? What would more or bigger holes do to the stream flowing from the water-balloon-bottle? Try it out! Balloons and bottles make a great science combo!

Source: http://www.stevespanglerscience.com/experiment/00000166

Sunday, January 23, 2011

Non Newtonian Fluid

Note: I really HATE all the advertisements here but the info is good.

(fluid mechanics) A fluid whose flow behavior departs from that of a Newtonian fluid, so that the rate of shear is not proportional to the corresponding stress. Also known as non-Newtonian system.


CAVEAT! 
1) I have no control over the lettering superimposed over this video.
2) Let me be clear ~~~> I do NOT recommend any other videos by this young man. -- I include this one only because it is harmless and it demonstrates a simple science experiment that introduces non-Newtonian properties that are easily experienced. AGAIN, I do NOT recommend any of his other videos.

THESE I DO RECOMMEND:
•  Mythbusters Season 4 Disc 1 
• AND!!  Learn about the nature of fluids 

FLUIDS IN GENERAL!

Kitchens are full of fluids you might never have known were there. A fluid can be a liquid, gas, solid, or even plasma. 

Viscosity is a measure of the resistance of a fluid which is being deformed by either shear stress or tensile stress. In everyday terms (and for fluids only), viscosity is "thickness" or "internal friction". Thus, water is "thin", having a lower viscosity, while honey is "thick", having a higher viscosity. Put simply, the less viscous the fluid is, the greater its ease of movement (fluidity).[1]
Viscosity describes a fluid's internal resistance to flow and may be thought of as a measure of fluid friction. For example, high-viscosity felsic magma will create a tall, steep stratovolcano, because it cannot flow far before it cools, while low-viscosity mafic lava will create a wide, shallow-sloped shield volcano. All real fluids (except superfluids) have some resistance to stress and therefore are viscous, but a fluid which has no resistance to shear stress is known as an ideal fluid or inviscid fluid.
The study of flowing matter is known as rheology, which includes viscosity and related concepts.


Cross posted @ http://homeschoolingnotebook.blogspot.com/2011/01/non-newtonian-fluid.html


SOURCES:
http://dsc.discovery.com/videos/time-warp-non-newtonian-fluid.html
http://www.answers.com/topic/non-newtonian-fluid
http://video.answers.com/learn-about-the-nature-of-fluids-83227076
http://www.youtube.com/watch?v=i_2u0fV3qTM&feature=channel

Saturday, January 22, 2011

Milk Fat Investigation


Cross posted @ http://homeschoolingnotebook.blogspot.com/2011/01/milk-fat-experiment.html
Note - Household Hacker is not a recommended source in most cases. This investigation is an exception.

Friday, July 16, 2010

Momentum and Marbles

MOMENTUM

Inertia means that a rolling ball on a smooth, level surface will roll forever if nothing stops it.

In fact, friction and air pushing against the moving ball will eventually bring it to a stop.

But interesting things happen when a motionless object gets in the way of a moving one. Try this and see for yourself.


  1. Tape the yardsticks to a tabletop so they're parallel and about 1/2 inch apart.
  2. Put 2 marbles in the middle of the sticks (our 'track') a few inches apart.
  3. Flick a marble so that it rolls and hits the other one. 
Notice that the one that had been rolling stops while the one that had been still now rolls!
The momentum of the rolling marble transfers to the other one, stopping the first and setting the second in motion.

  1. Now put two marbles on the track so they touch, and a third several inches away. 
  2. Flick the single marble into the other two. 
Notice that the rolling marble stops, the middle one stays put, and the third one rolls. The momentum went through the second marble into the third.

Try other combinations: two marbles into three still marbles, or three into three. You'll find that however many marbles you set in motion, the same number will be made to roll when they're hit.

This experiment introduces 3 concepts about and momentum :
  • Momentum can transfer from one object to another.
  • Momentum can pass from one object, through a second, and into a third.
  • The total amount of momentum at the beginning will stay the same.

EXPERIMENT SUPPLIES
Supplies: Yardstick, Marble

Cross Posted @http://homeschoolingnotebook.blogspot.com/2010/07/momentum-and-marbles.html